[공지] SMS114.CO.KR 바로가기
www.sms114.co.kr
👉 텔레그램 상담 바로가기
[Summary] 초고속 워드프레스 셋팅
10-2. 초고속 워드프레스 셋팅
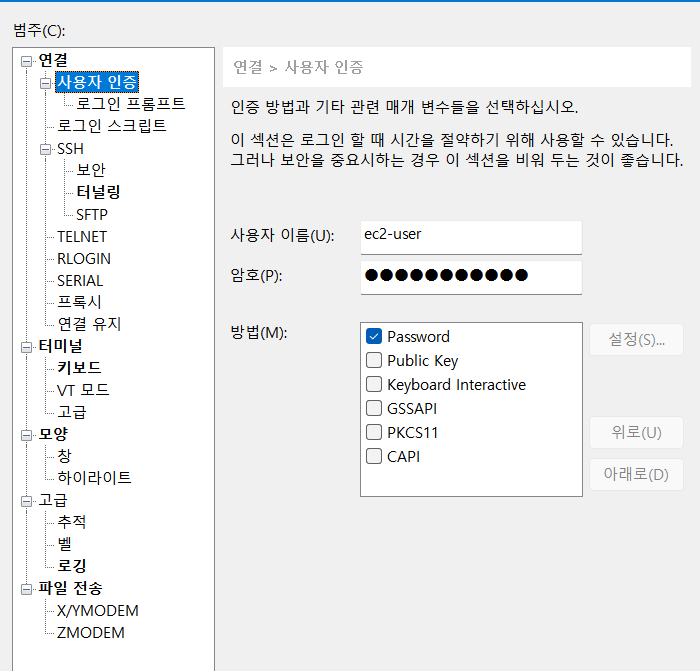
1. SFTP 비밀번호 접속 설정
Amazon EC2 keypair 접속 이외, 즉 id/passwd 접속을 하려 한다면 아래 처럼 처리하면 됨.
#> sudo passwd ec2-user
#>     New Password :  xxxxxxx
이제 key파일로도 접속 가능하지만, id/pw 여도 SSH, SFTP 접속이 가능하다.
하지만, 해야 할 일이 하나 더 있다.
바로 /etc/ssh/sshd_config 에서 하나 더 수정해줘야 할 옵션이 있다.
[ec2-user@ip-172-31-37-25 html]$ sudo vi /etc/ssh/sshd_config
들어가면,
# Explicitly disable PasswordAuthentication. By presetting it, we
# avoid the cloud-init set_passwords module modifying sshd_config and
# restarting sshd in the default instance launch configuration.
#PasswordAuthentication no
PasswordAuthentication yes
PermitEmptyPasswords no

# Change to no to disable s/key passwords
#KbdInteractiveAuthentication yes

# Kerberos options
#KerberosAuthentication no
#KerberosOrLocalPasswd yes
위, PasswordAuthentication 를 ‘no’ 에서 ‘yes’ 로 변경 해 줘야 한다.
비로소, id/pw 접속이 가능하다. ssh_config 파일을 수정 해 줬으니,
Apache 서버를 재시작 해야 한다.
apache는 root 계정으로 재시작해야므로 sudo systemctl 로 재시작 한다.
$ sudo systemctl restart sshd
2. VSCODE 에서 내 IP 와 SFTP로 Directing Connection 처리하기
-
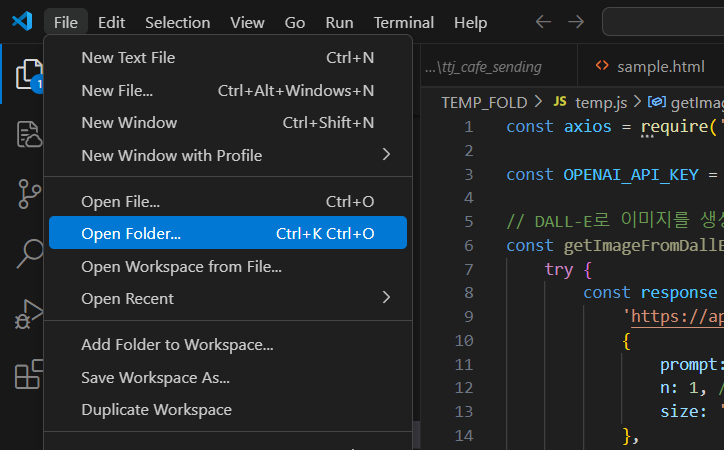
VSCODE 에서 해당 폴더로 Open 한다.
-
왼쪽 메뉴, Extenstions ( Ctrl + Shift + X ) 클릭 후, sftp 를 연다.
-
“sftp sync extension for VS Code” 를 install 한다.
-
install 완료 된 후,
-
F1 키를 누르고, sftp 를 쳐 넣는다.
-
SFTP:Config 를 선택한다.
-
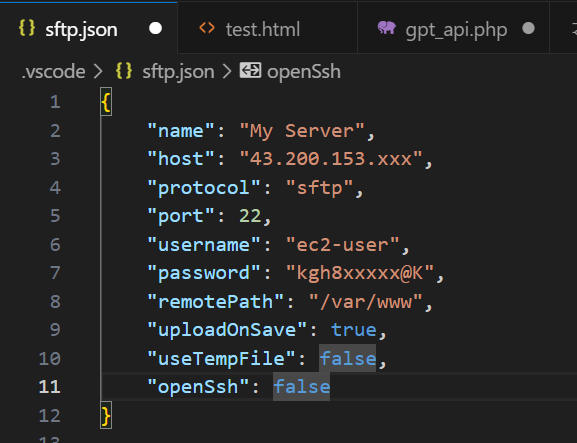
해당 폴더에 sftp.json 이라는 파일이 생겨나게 되고, 각 요소의 값을 입력한다.
-
- 이렇게 셋팅을 끝내고 다시 F1 키를 누르면 처음의 SFTP:Config 이외에도 더 많은 식별 명령어가 보이게 될 것이다. 일단, SFTP:ListALL 을 누르고, 엔터, 엔터, 누르면, 내 IP Linux 폴더가 바로 보이게 될 것이다.
- 자! 끝났다. 이제는 Local에서 파일을 수정하고, 일일이 FileZilla 를 열어서 upload 해 줄 필요없이, 수정되면 자동으로 연동된 폴더/파일이 수정 갱신 되어질 것이다.
댓글남기기